|
Fiero Headrest
Speakers |
|
|
Speaker Holes option |
|
|
|
|
Fiero Headrest
Speakers |
|
|
Speaker Holes option |
|
|
|
|
To access the headrest
speakers To add or replace headrest
speakers Fiero headrest speakers do not attach to anything, they just float in the foam. When you buy replacement speakers they have tabs attached for screwing them into the car. If the new speakers have just two tabs you're fine. If they have four tabs just cut off two of them with a metal snip.
Speaker recommendations? Listen to them at the store, remember that they
will be ‘right in your ear’. Please note that speakers obtain their base
response from the enclosure, the foam of the headrest is a lousy enclosure,
error on the side of a deeper sounding speaker. Mention this to the sales
person. The speakers shown here are Blaukplunkt
3.5" |
|||||
Speaker wire to make a harness:, many speakers come with wires,
if not purchase at least 20 feet.
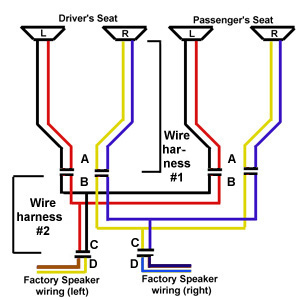
To locate the stock wiring, which should be under glove box/console. You should see the factory wiring harness:
You can splice into these lines and add quick connectors, so as you can connect to Harness #2 (Junction C&D) (shown in green on the picture below, right) |
 |
||||
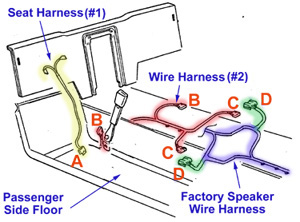
| Harness #1 (Yellow), Junction A, should exit the hinge side of the seat, nearest to center tunnel (as shown below). Harness #2 (Red) should connect the factory wiring (Junction C&D), then run along the center tunnel and exit out the carpet, at the bolt hole for the seat belt anchor, next the center tunnel (Junction B). Now is the time to install Harness #2. |
 |
||||
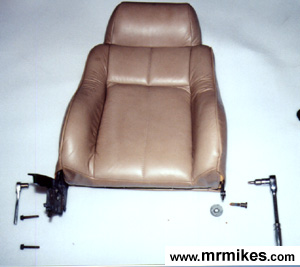
| How to prepare the seat
for speakers: Remove: Seat (four bolts) Center console (glove box) Seat from Fiero |
 |
||||
| Remove: Torx and 13mm Bolts to separate the backrest from the cushion. |
 |
||||
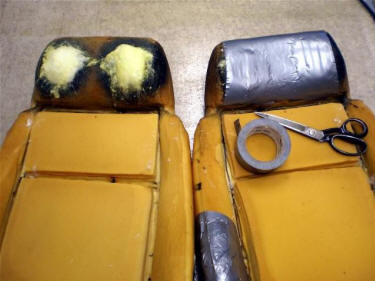
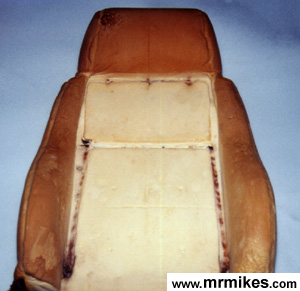
1. Remove the backrest upholstery. 2. To remove upholstery: Open the zipper on the bottom (spray with oil first-you don't want to screw up the teeth- it has been used only once-15 years ago). Then using side cutter pliers grab and twist off the old hog rings to release the upholstery and the "LISTING RODS" 3. Remove Listing Rods . These are the pencil thick metal rods that give the upholstery that "sucked in" look. Remove by pulling them straight out. 4. Pull the upholstery up equally a few inches on each side, turning it inside out as you go, (like taking off a wet T-shirt) 5. Pull the upholstery (inside out) all the way up until it stops at the base of the headrest. Use the side cutter pliers to remove the hog rings at the base of the headrest. Be careful not to damage this 'headrest mount', it is only a plastic wire in the foam. 6. Pull up, Presto, it's off. |
 |
||||
Print out the
headrest
speaker pattern (requires free Adobe Acrobat Reader)
and line up four pieces of paper using the layout below. Tape them together. Cut out
the pattern.
|
 |
||||
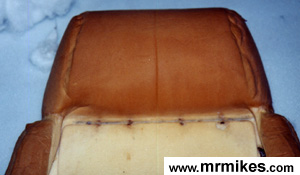
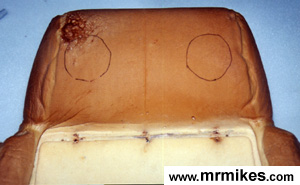
| Lay the pattern over the top of the headrest with the round holes facing the seating area. The pattern starts at the bottom of the headrest and wraps over the top of the headrest. As shown at the right. Center the pattern. The exact position of the holes is not that important, but you should be as close as possible. |
 |
||||
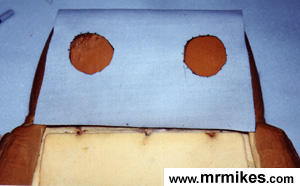
| Using a marker, trace the speakers holes on the front of the seat. Also trace the air holes on the back of the headrest. |
 |
||||
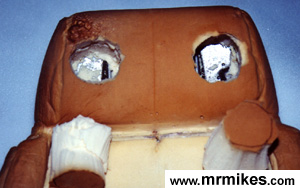
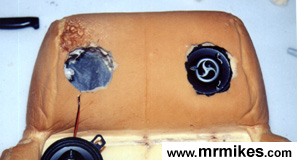
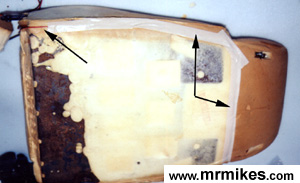
| Using a sharp knife, cut out the holes. *The plug should have a slight conical shape so as the area next the metal backing plate is larger than the opening. As shown on the "plug", on the right, in the picture.
|
 |
||||
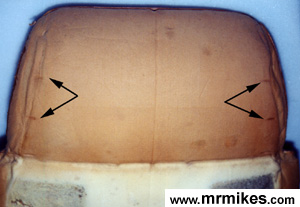
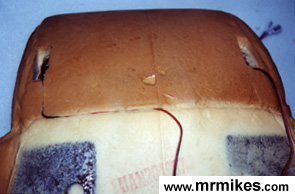
| Turn the seat back over and note the two small indentations in the back of the headrest. They should line up closely with your pattern. |
 |
||||
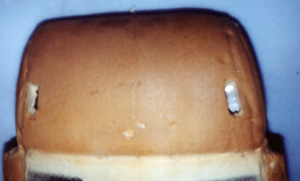
| Cut out rectangles using the indentations as reference points
(top and bottom)
|
 |
||||
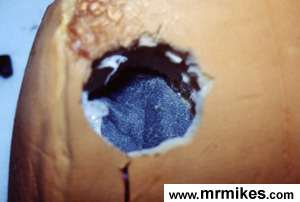
| For a speaker to work correctly it needs to
move air. Your new leather seat covers come with air holes in the
headrest back, for this reason. However the 1986-1988 Fiero seats do
not have this opening. Use your 1/2" drill bit (or a similar large size bit) and drill some holes in the metal so as the holes line up with the rectangular opening in the back of the headrest foam. If your drill bit rips the foam, use spray glue to glue the foam back into place. Make sure you can see through the newly drilled holes... this way the air will move freely. |
 |
||||
| Cut a piece of 1/4" foam so at it will fit on
the back of the speaker opening. Be careful not to cover up your newly drilled holes. Use spray glue to attach this foam to the metal. This foam is put in there so the speaker doesn't vibrate against the metal within the seat. It also will keep the magnet of the speaker from contacting the metal of the seat (bad). |
 |
||||
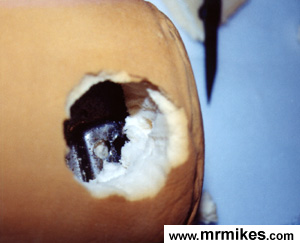
| Run your speaker wires from the back, through
a drilled hole and out the front of the speaker opening. Attach the speaker. Mount the speaker into the hole. Mount the speaker so it has room to operate freely (the cone can move freely). If you need to, cut more foam out. If you take to much, use spray glue to glue some foam back into place. |
 |
||||
| Using a sharp knife, cut a small slit on the
back of the seat foam. Cut the slit so as it runs down to the 'inboard' side of the seat, the side that will be up against the console, when the seat is bolted back in the car.
|
 |
||||
| Use duct tape to cover the wires in the foam. *Note the wiring coming out the bottom of the seat back, side nearest to the console. Test
the speakers! by hooking up the wiring. |
 |
||||
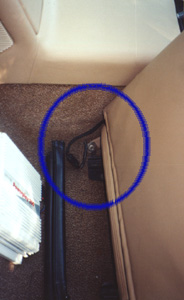
| When installing your seat connect your wiring as shown to
the right. What is circled is the connection between the seat speaker wiring and the
wiring from the center console... (wiring harness A to B). This is the passenger side of the car, with the seat slid forward. You can see the wiring harness B came out of the carpet at the seat belt anchor hole.
|
 |
||||
| Here is the back of the headrest with the air holes to allow for movement of air behind the speaker. |
 |
||||
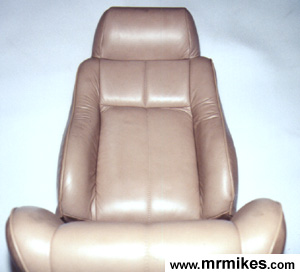
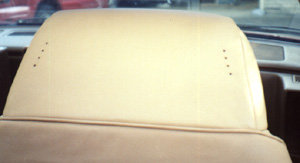
| Here are the headrest speakers, completed and
in the car.
Enjoy :) |
 |
||||
Back
(c) mrmikes.com